Do-it-yourself Roman and roller blinds 3 master classes
I really respect all kinds of draperies, curtains, curtains, tulles. Moreover, my profession obliges me to do this. But life dictates its own rules, and I started decorating my windows less than a year ago, and before that I had to be content with a pair of “universal” curtains that moved with me from apartment to apartment for years.
But even here it’s not possible to approach window textiles properly and thoroughly - the repair is not completed and, quite possibly, will not be completed, and somehow the window will have to be decorated directly on the drywall…
Since full-fledged curtain rods don’t work for me yet, I also have a gas boiler on half the wall, so I settled on roller blinds or Roman blinds. Fastening roller blinds is light weight, you don’t need to make a lot of holes, Roman blinds are sewn simply, and sometimes they are not sewn at all.
I found 3 master classes on DIY roller blinds. So that translations of the material do not go to waste, I will share.
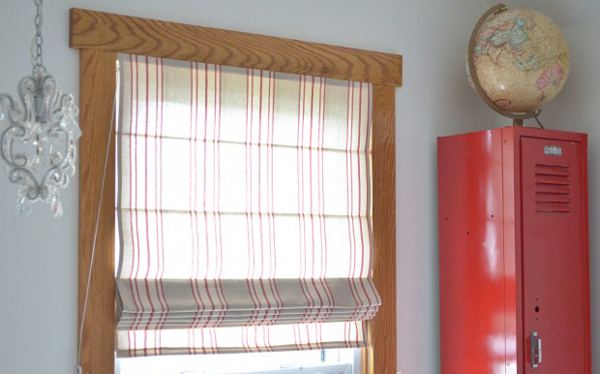
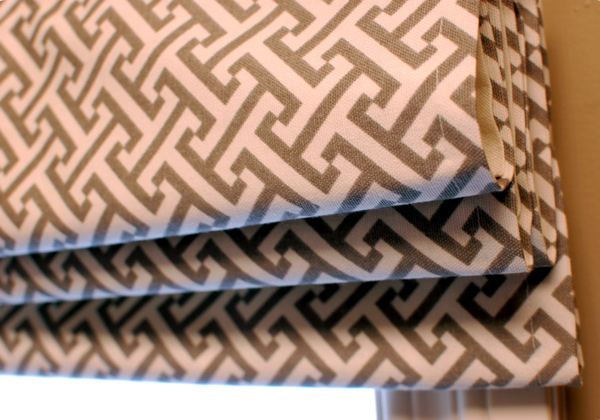
DIY Roman blinds made of linen
A big plus of using flax for sewing roller blinds is the dense “starched” texture and at the same time allowing daylight to pass through.
We will need:
- piece of fabric
- smooth cord
- wooden rods (any rods in general, you can use plastic hollow tubes and aluminum rods - there’s a lot of this stuff in construction markets)
- wooden beam
- roulette
- scissors
- sewing machine
- carpet needle for pulling cord
- hammer, pliers, stapler
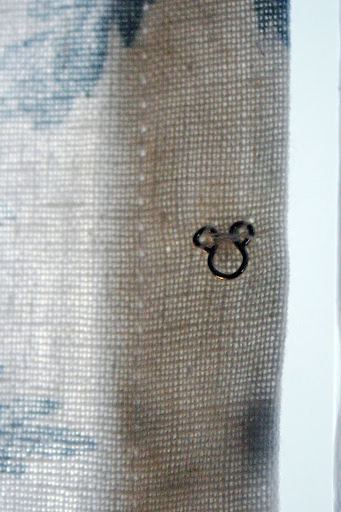
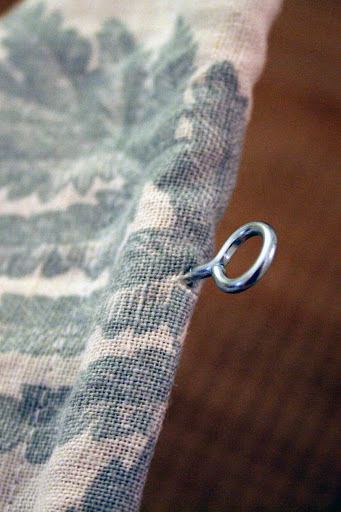
- two eye screws.
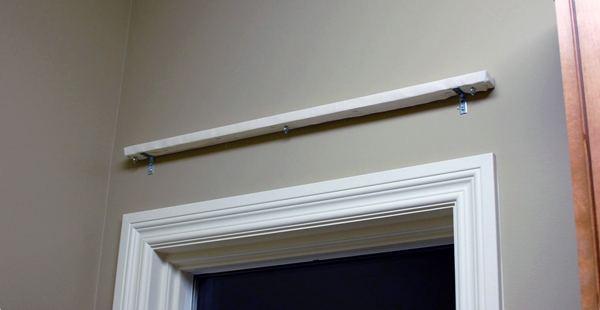
- The beam must be the width of the window. But in the end, you can hang roller blinds in several ways, which I will describe at the end. In this case, we have a wooden window frame, so it is convenient and logical to choose a fastening beam according to the size of the window opening. We take measurements along the width, tuck, baste (if necessary). It is advisable to leave a centimeter allowance from the beam.
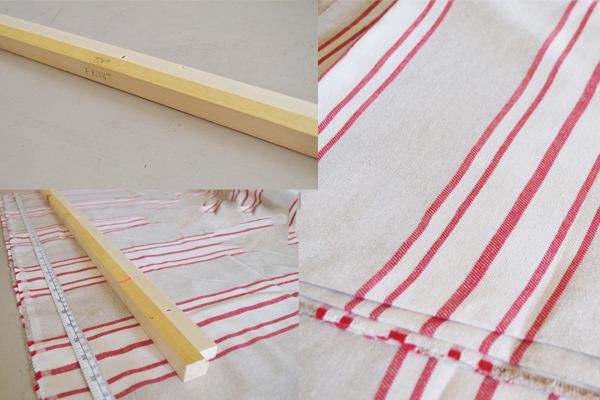
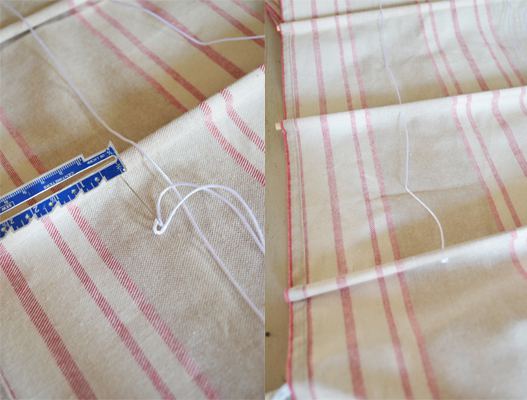
- Baste the folds. Each rod needs a “pocket”, which will later become a fold. Don’t forget about the overlap on the top beam; while we’re just basting, don’t cut anything. The upper part of the fabric is traditionally longer than the rest of the folds, but this is a matter of taste and the functional purpose of the curtain.
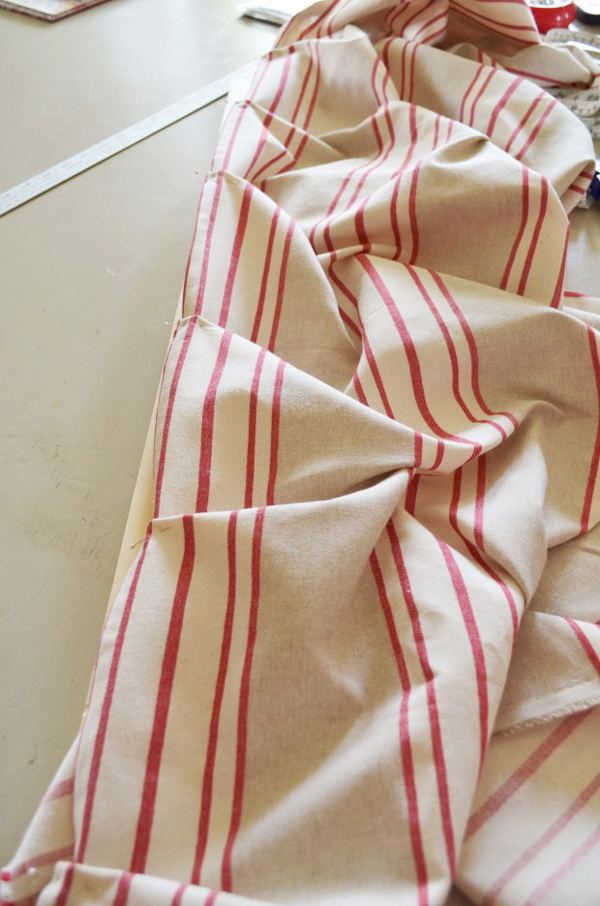
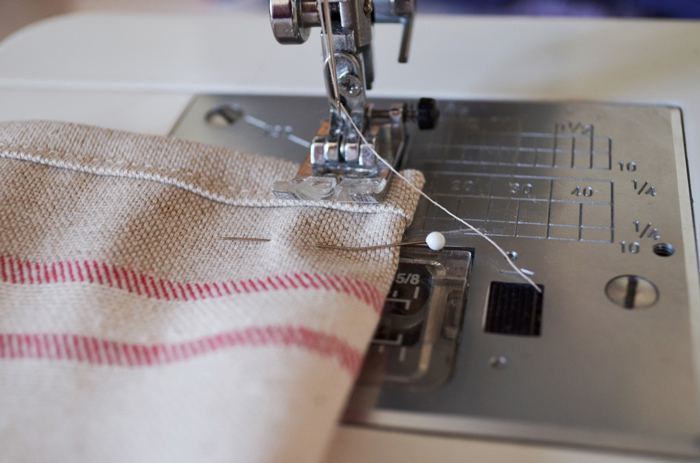
- If everything has been measured 7 times, you can start cutting and sewing. We consistently make a “pocket” stitch for the rods.
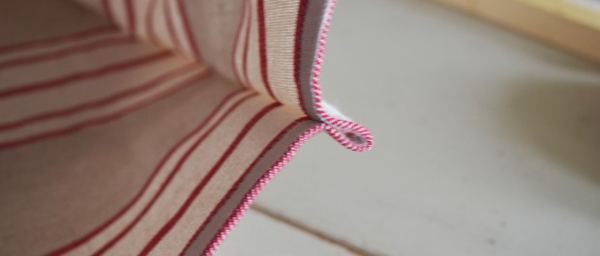
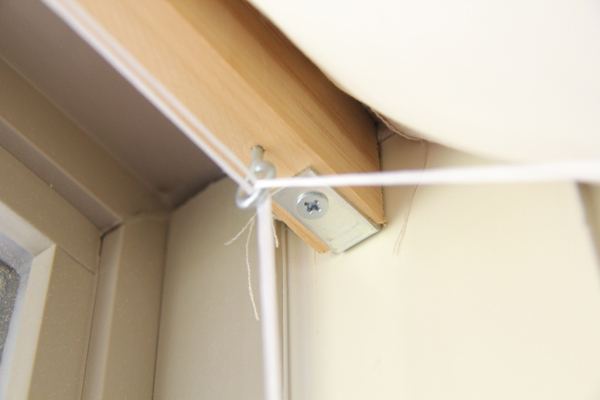
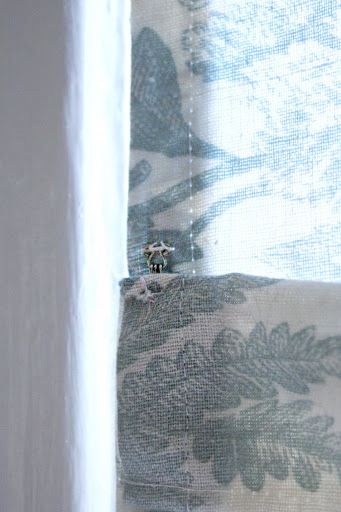
- We stuff the fabric onto the fastening beam, screw in the screws with lugs strictly in those places under which the cord on the curtain will be pulled. The author of this master class pulls the cord directly through the fabric, but I prefer a sewing loop for this, or a small sewing ring - the cord will easily “walk” along the curtain, which means less load on the structure.

The cord must be routed through the top. You can attach it to a hook on the wall.
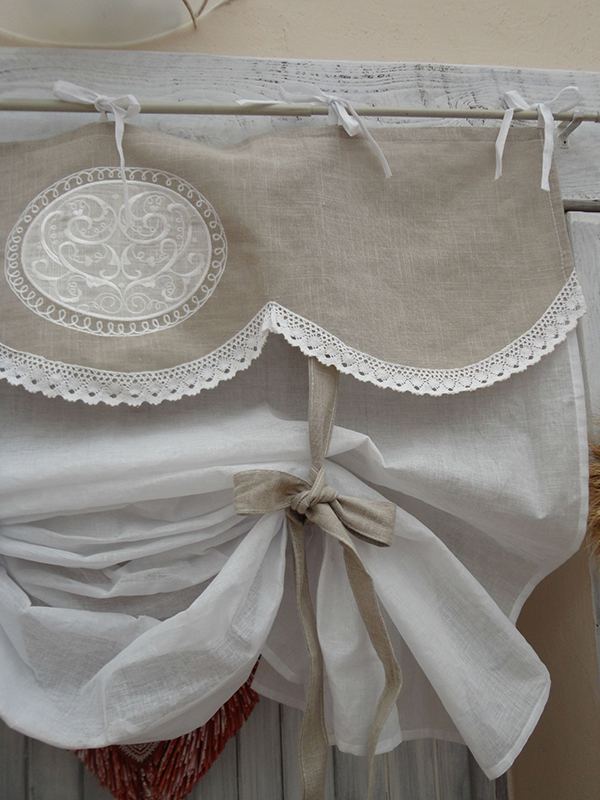
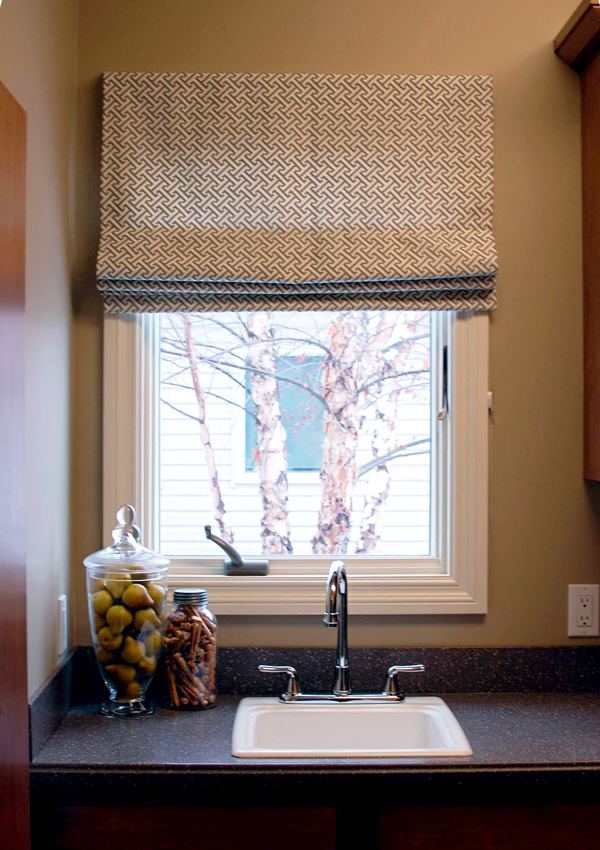
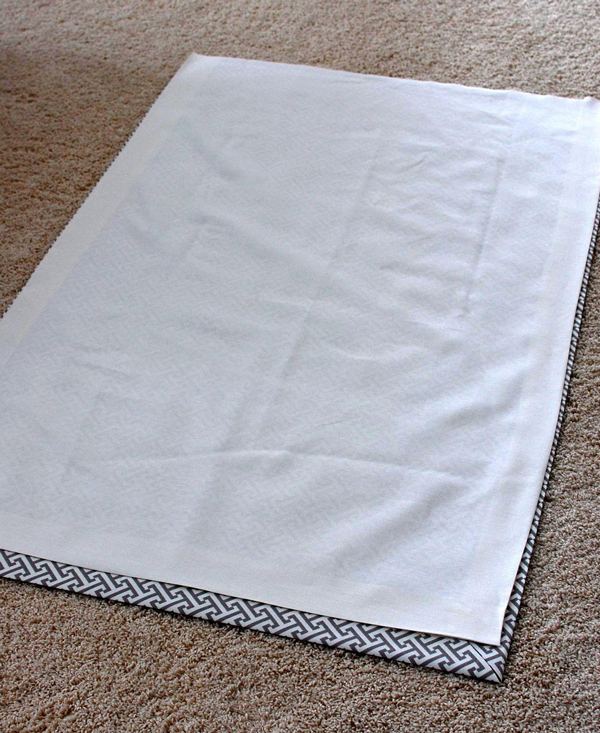
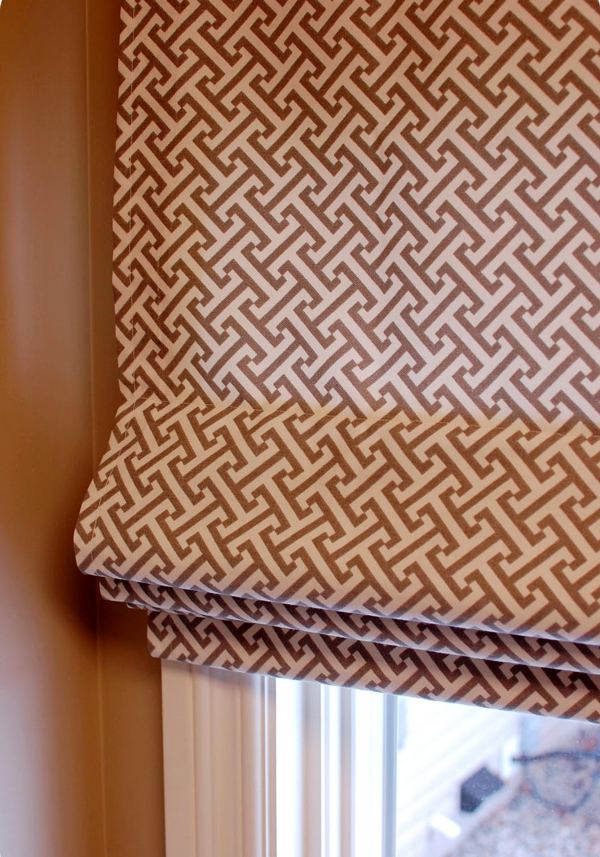
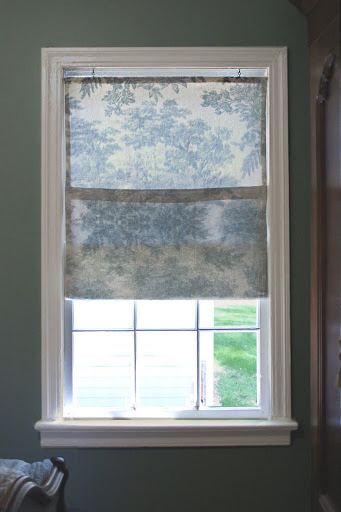
Roller blinds with lining
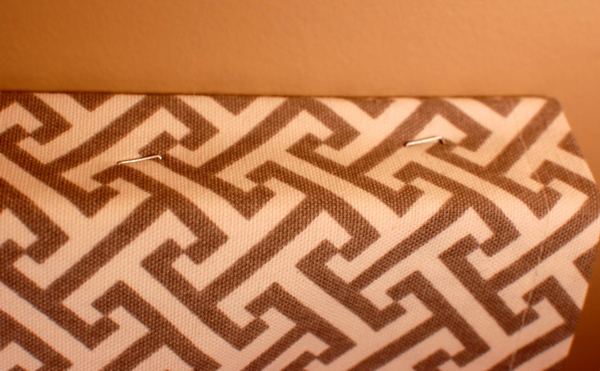
These curtains were made using upholstery fabric that holds its shape. I really liked the option of attaching the entire structure to the wall at the corners. In my opinion, there is no need to stuff fabric onto the beam. you can glue Velcro to a piece of wood and sew it onto the fabric, because you will have to wash the curtains sooner or later.
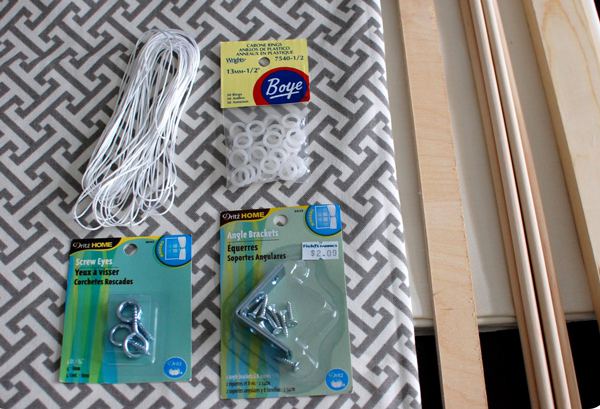
We will need:
- Textile
- lining
- rods
- weighting material for the lower part of the curtain (a strip of kragis, for example, very thick cardboard, sawn wood. But you can get by with a rod.)
- beam
- cord
- eye screws
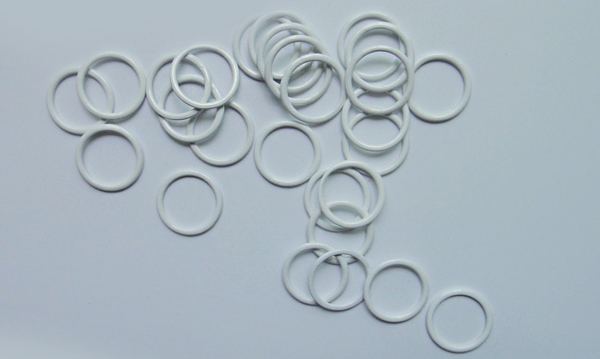
- sewing rings (or hooks)
- mounting angles
- tool, tape measure, iron…
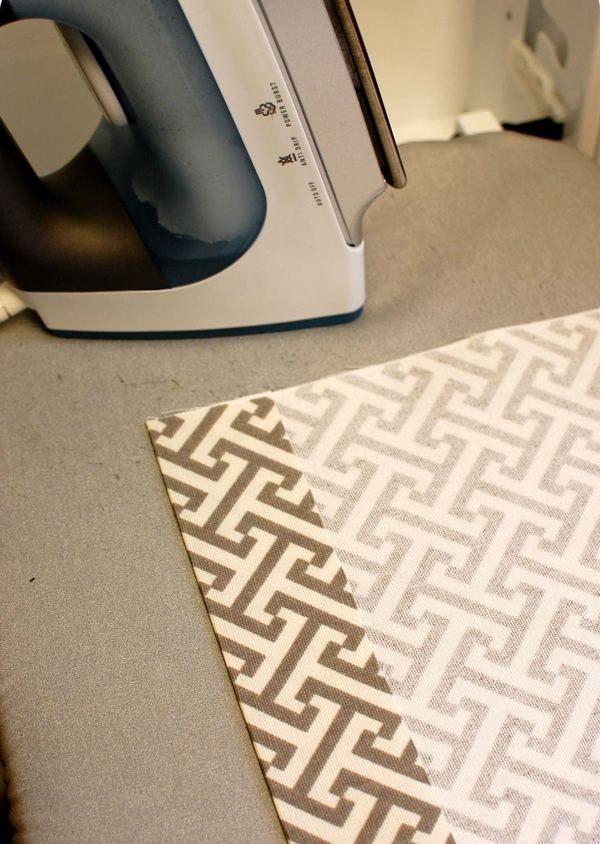
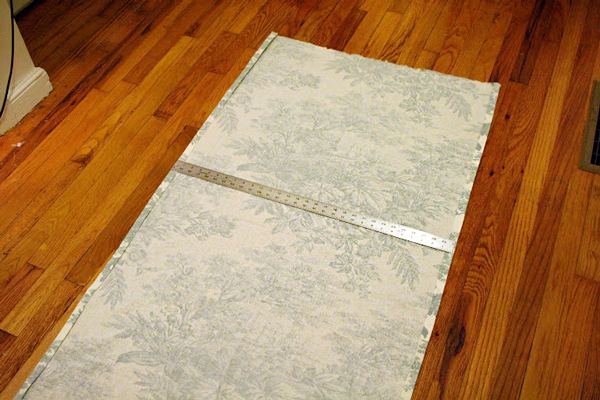
- Take measurements, decide on the length of the canvas and leave an allowance of 10 cm in width and 20 cm in length.
- Fold in a 5 cm seam allowance on the sides and bottom edge.
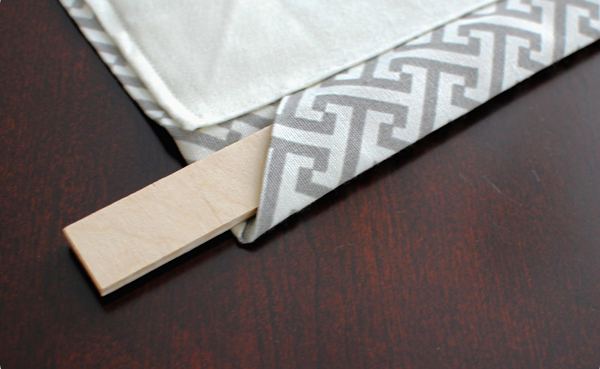
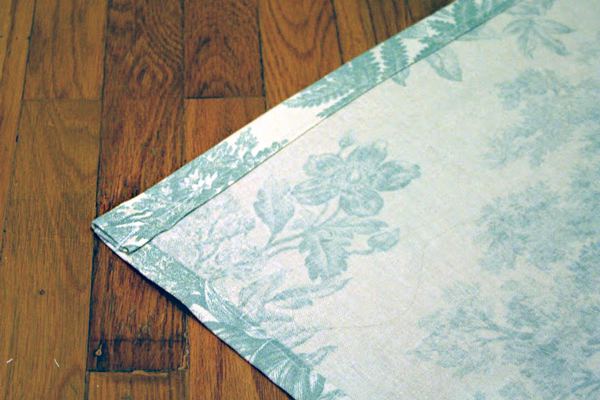
- Hiding the corners, as in the photo.
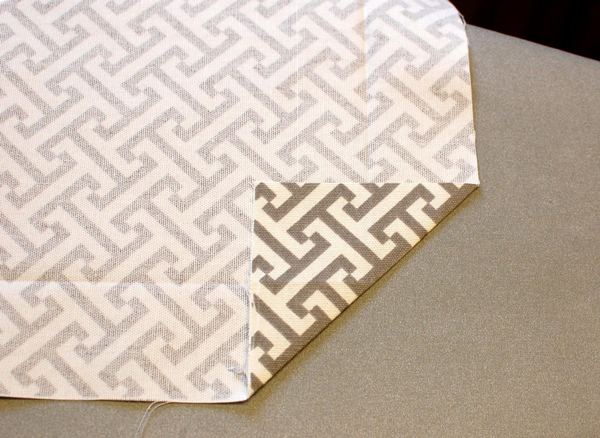
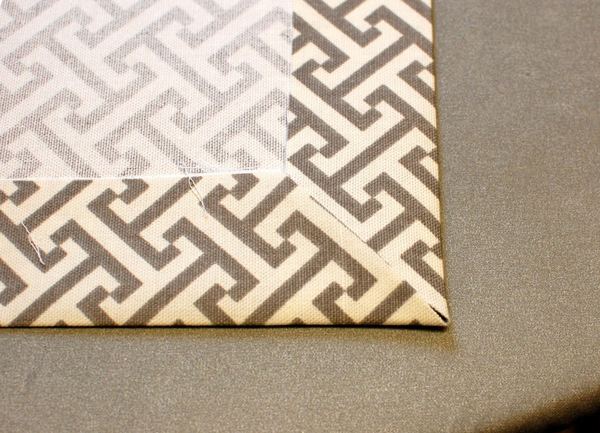
- We do the same with the lining.
- Sew both fabrics, along the sides and bottom edge.
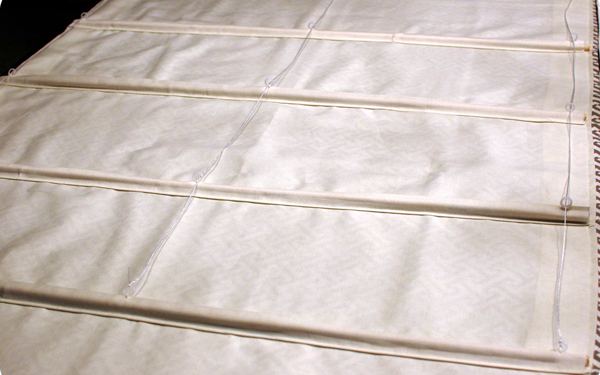
- Decide how many rods you need. Divide the fabric into equal intervals and mark with a pencil.
- A separate “pocket” is sewn for each rod. In this master class, the author folds raw fabric, but no one forbids using a ribbon of suitable width, or any durable non-woven material.

- Sew pockets along the bottom edge of the curtain.
- We insert a rod into each pocket, and a weighting agent into the pocket along the edge.
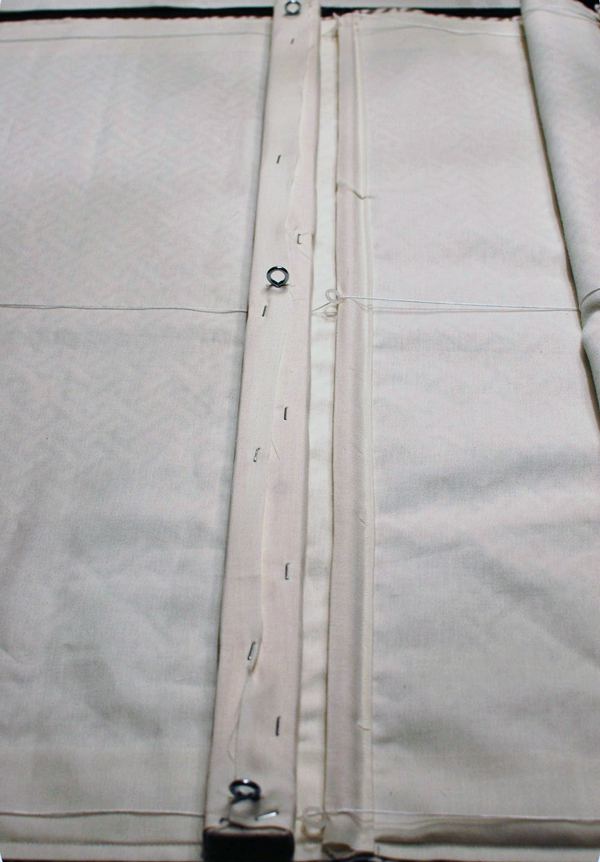
- Sew three rings onto each pocket, as in the photo.

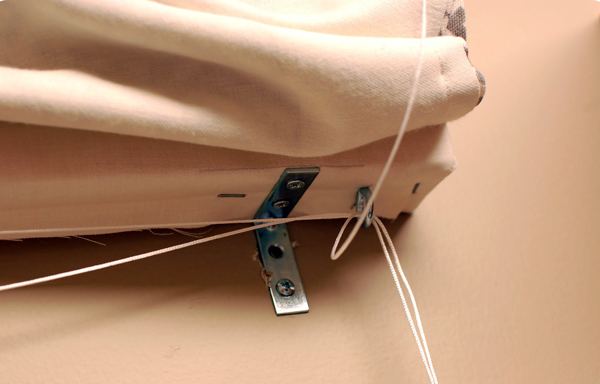
- We divide the cord into three parts, solder it if necessary, and tie each cord to the lowest rings. We pull the cords through the remaining rings on top of the lower ones.
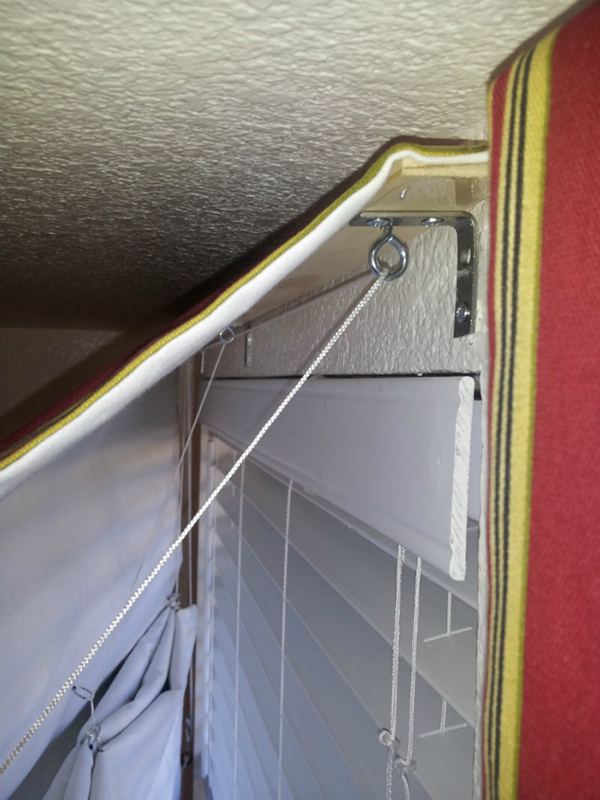
- We fasten screws with lugs to the beam at the same distance as the rings are sewn on the fabric.
- Screw the corners to the wall or the ceiling internal slope of the window, screw the beam to them (or first the beam to the corners, and then to the wall).
- Try on the curtain. At this stage, you can still shorten the canvas. Attach the curtain to the beam. In this case, firmly with a stapler, or you can sew on Velcro.
- Pull the laces through the screws so that all three come out into one third screw (on the right and on the left, depending on which side the hook for the cords will be on).
“Almost” Roman blinds in an hour
Do-it-yourself express version of roller blinds. I like the extremely simple method of lifting mechanism - sewing loops. These curtains can become a basic example, the basis on which you can sew the perfect curtains for you. We will need:
- 2 rods
- 2 or 3 eye screws, hook screws (depending on the width of the window)
- fabric.
All these projects are not at all complicated and cost pennies. The main thing is “measure twice, cut once.”
DIY methods for attaching Roman and roller blinds: