Quick renovation of furniture with your own hands
The previous owners of the house left a ’tired’ kitchen chest of drawers made in 1963. In winter, we finally got around to bringing it back to life. I considered several options for DIY furniture remodeling and decided on decoupage with fabric. I’m very pleased with the result, and decided to share some thoughts about updating old furniture with fabric.
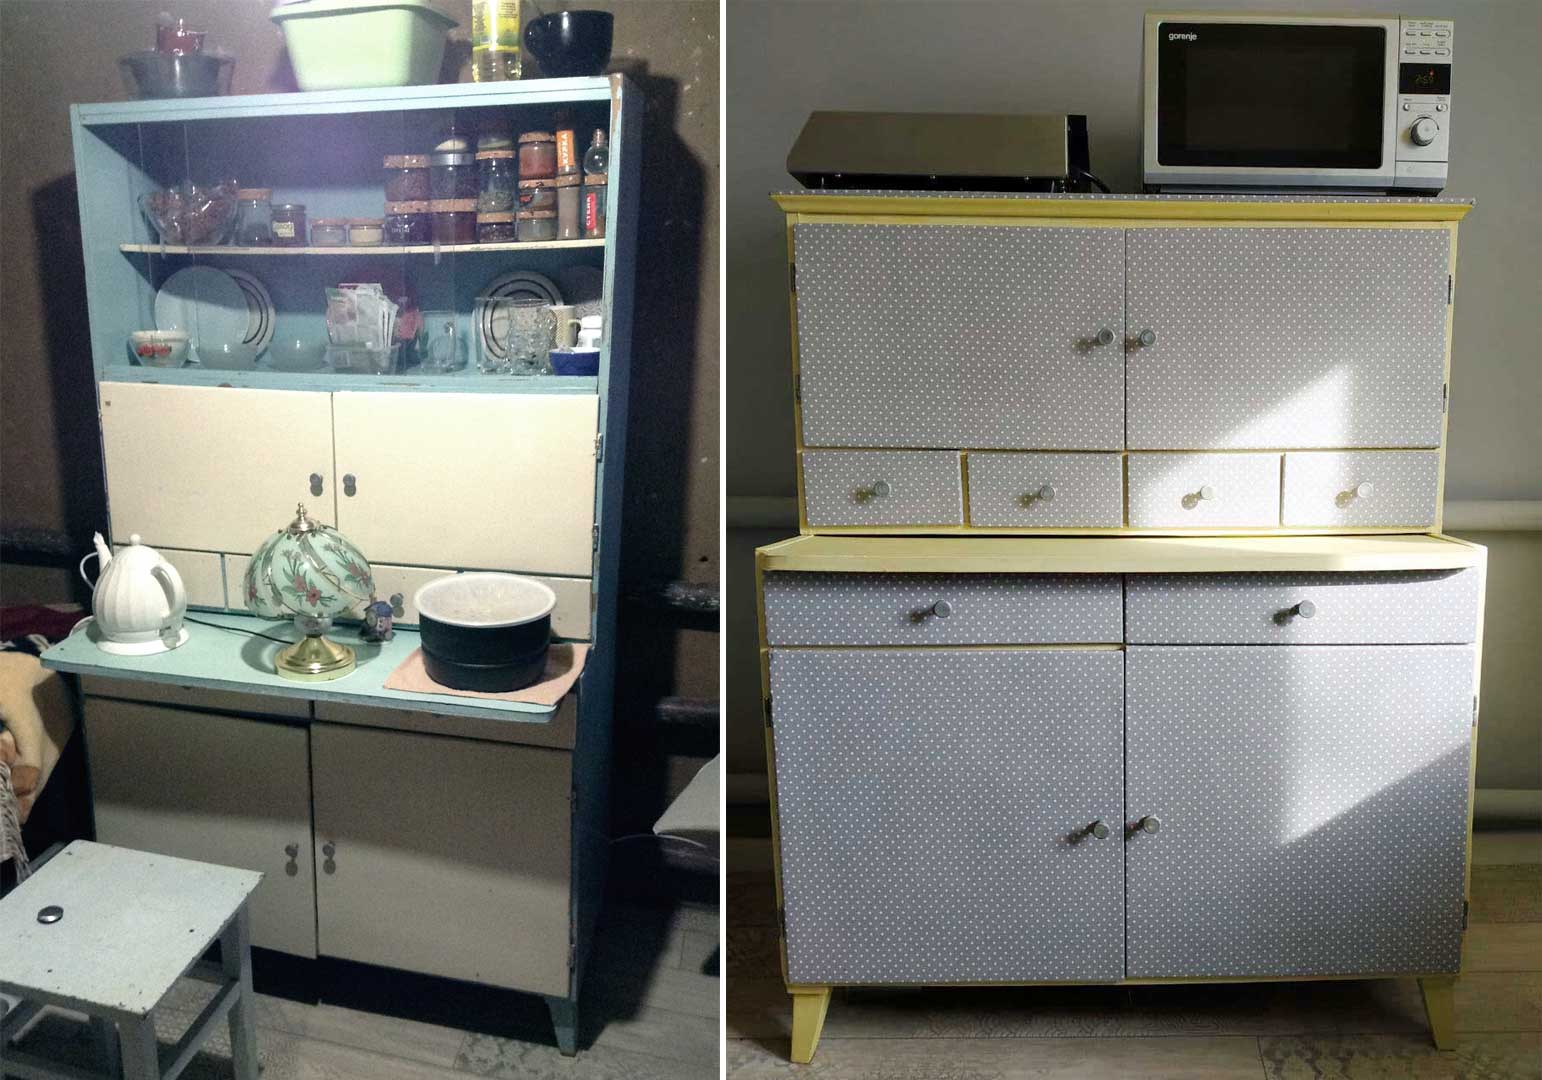
There are no step-by-step photos, it completely slipped my mind during the process. However, the process of covering furniture with fabric turned out to be simpler and faster than preparation for remodeling. The sad “before” photo turned out to be the only one that captured the original appearance, I apologize for the mess - I had to temporarily live “in clay”.
Why decoupage with fabric is better than repainting
- Limitless choice of design and texture. For practical reasons, it is better to choose from smooth medium-weight fabrics, but there is no compelling reason to refuse corduroy or tapestry if you want.
- With minimal surface preparation, you can cover any furniture with fabric: polished, varnished, plastic, painted.
- This is the fastest and easiest way to DIY repair and redesign furniture, which does not require professional skills and tools. You won’t have to go to the art supply store either.
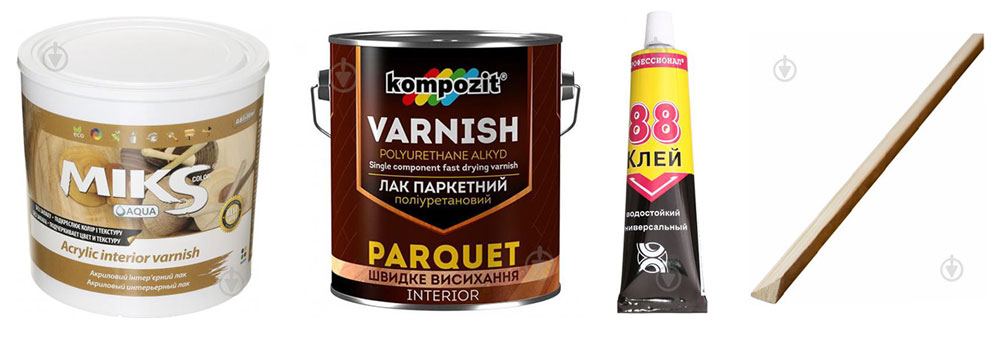
- The list of required materials comes down to glue, varnish, brush or roller. You can glue the fabric directly onto the varnish, which is what I did.
- The final appearance of the product does not at all resemble a hasty craft.
Step-by-step instruction decoupage furniture with fabric
- Surface preparation. Sand the old coating with sandpaper or a sander machine. Polishing and paint can be removed with a heet gun, but it doesn’t always make sense to do. In my case three layers of paint were very difficult to achieve. If the base is dark and the fabric is light or thin, you can apply one layer of white acrylic enamel and, after drying, also sand it for better glue adhesion.
- Choice of glue. In my case, light polyurethane parquet varnish replaced glue. Water-based acrylic furniture also glues fabric well to a different coatings, if the surface was pre-matted (sanded). I do not recommend PVA or silicate glue. For gluing hems on the inside of doors and cabinets, quick-setting adhesives glue for rubber are suitable. At all stages of decoupage fabric you can use only varnish. I saw a master class on decoupaging furniture with fabric used starch paste. Spesial Fabric glue also well to a variety of surfaces, but may show pink spots.
- Choice of fabric. The photo shows cotton calico 125 g/m2 and 135 g/m2. It is easy to apply a protective layer of varnish to the smooth material and use this furniture even in the kitchen. Therefore, the choice of texture and density must be approached from a practical point of view - finishing a chest of drawers with velvet in the bedroom can be quite justified and practical, but not in a nursery or kitchen. Knitwear and translucent materials such as crepe silk will be difficult to work with.
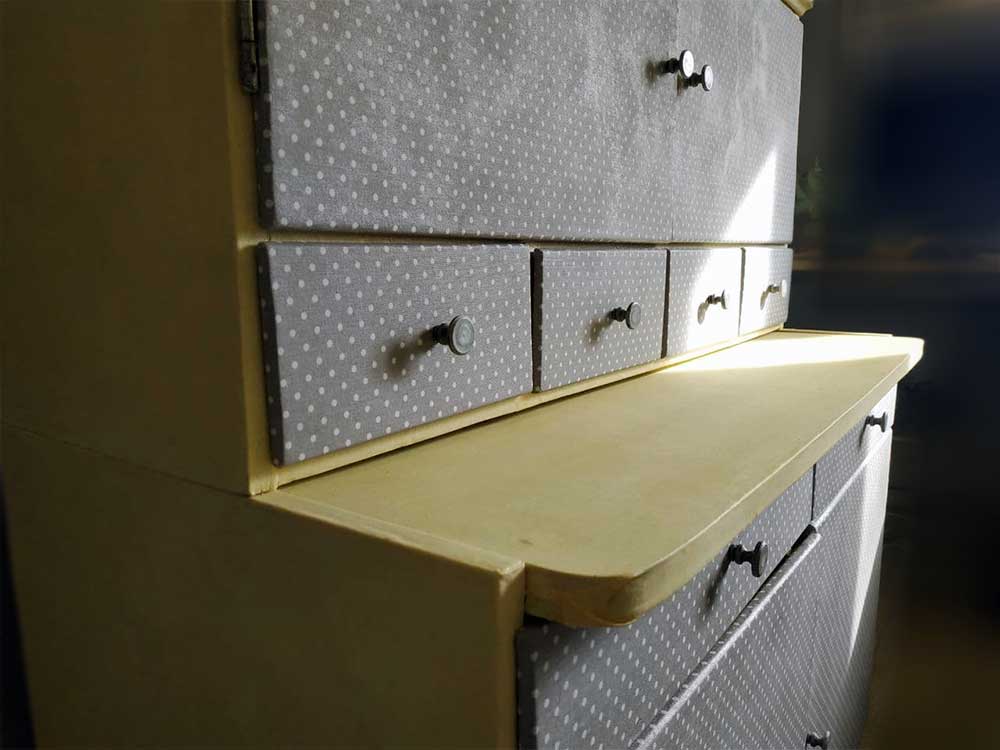
- Measure and cut. Take measurements, taking into account the thickness of the doors, cabinets and hems on the inside of 1-1.5 cm. It is convenient for me to make a pattern to scale and assemble a puzzle from paper parts in order to rationally distribute the fabric, without buying extra centimeters.
- Pasting furniture with fabric. Wipe sanded surfaces, fill small chips and uneven areas with wood putty or any acrylic glue, such as liquid nails. It is convenient to paste over the doors after first removing them from their hinges. Apply the varnish with a roller or brush, let it set for 2-3 minutes and glue the fabric, slightly smoothing from the center to the edges. Allow the piece to dry for at least 6 hours, then glue the hems and edges.
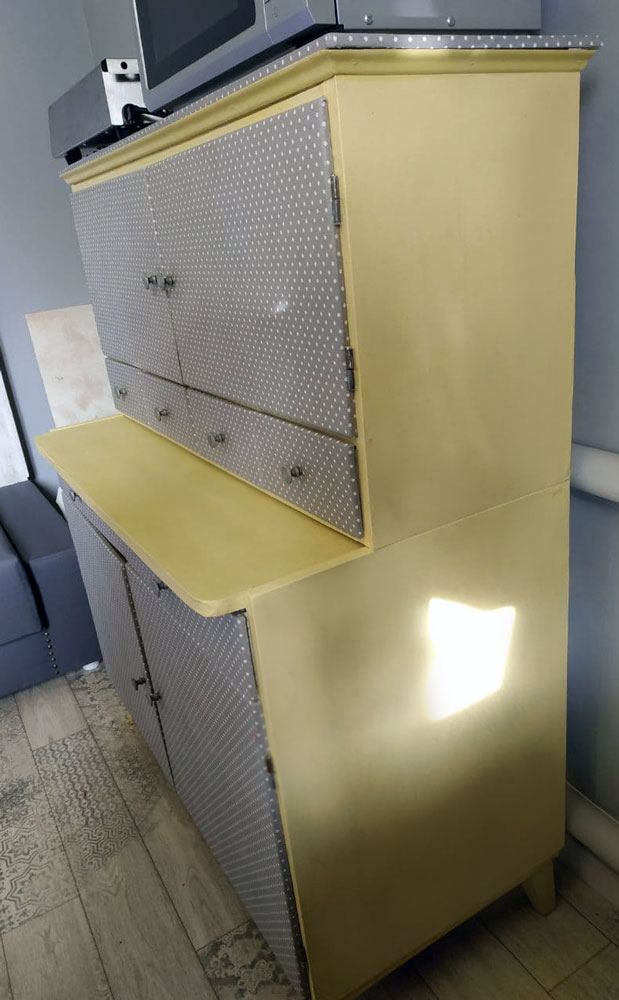
- Applying a protective layer. I glued it onto parquet varnish, and for the finishing layer I used colorless acrylic (unfortunately, it was only semi-gloss). The fronts were coated three times, with light sanding of the first two layers, according to the instructions. For the tabletop, I used a piece of plasterboard covered with the same fabric and varnished.
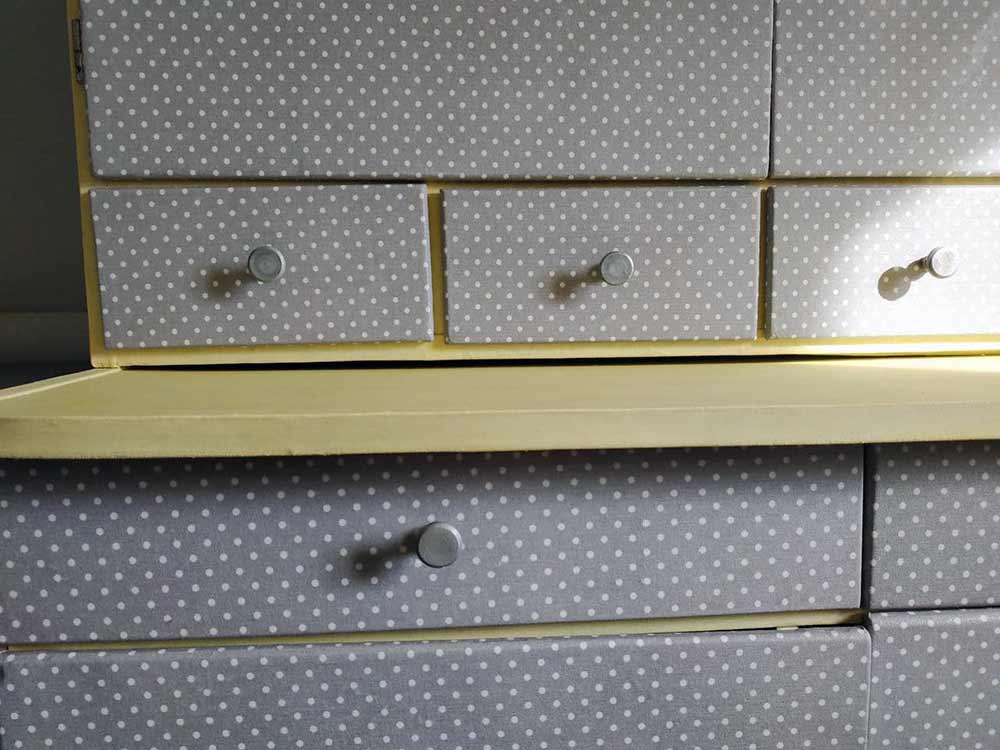
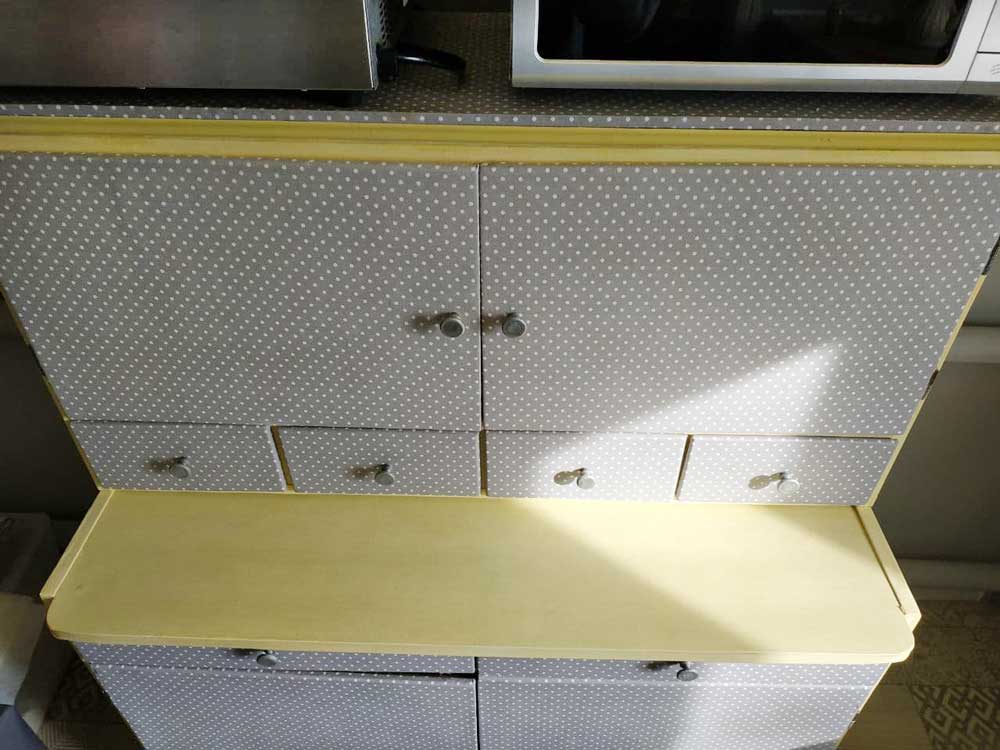
- Additional decor and finishing. In my case, the decision was made to remove the sideboard part of the chest of drawers. I glued a wooden baseboard molding along the edge and secured it with a couple of small nails. I painted it with the remaining ceiling paint (our ceiling will be yellow for the next ten years). The tabletop is a piece of plasterboard, covered with the same fabric and varnished.
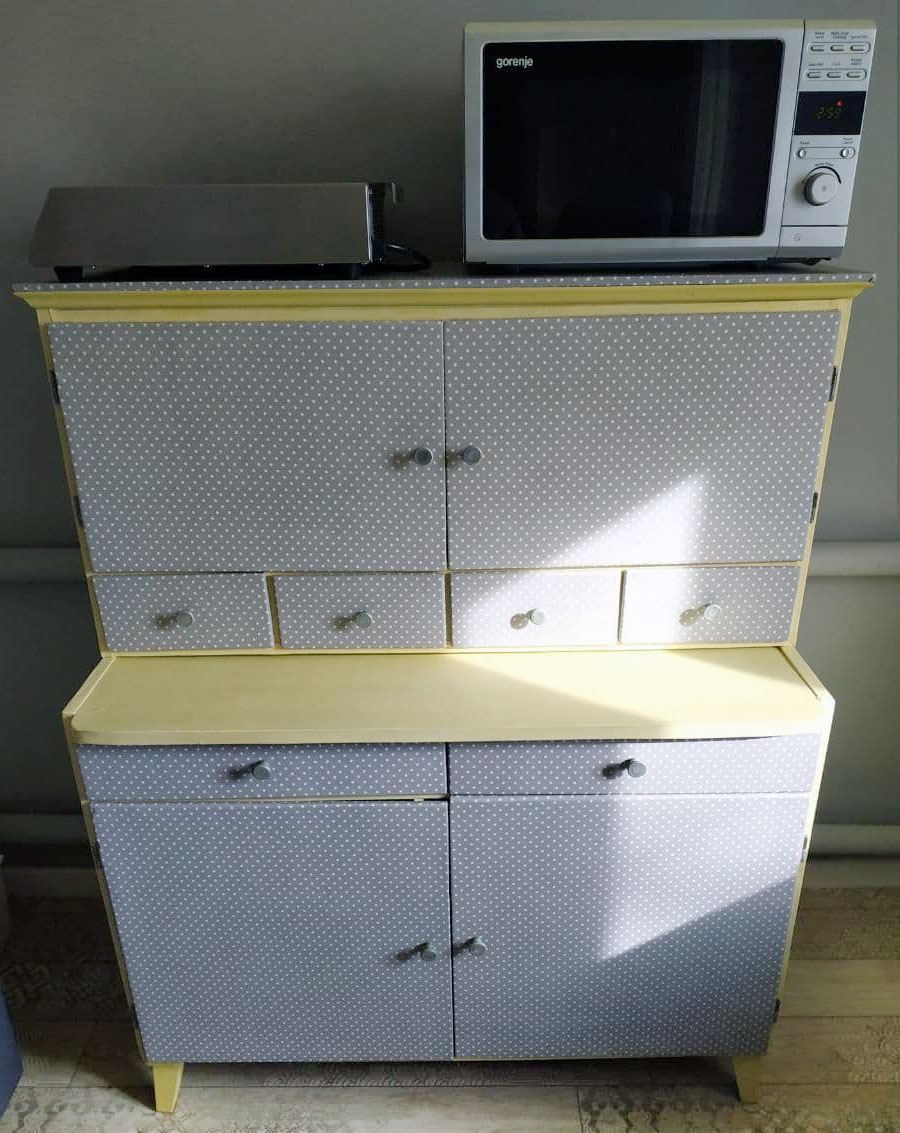
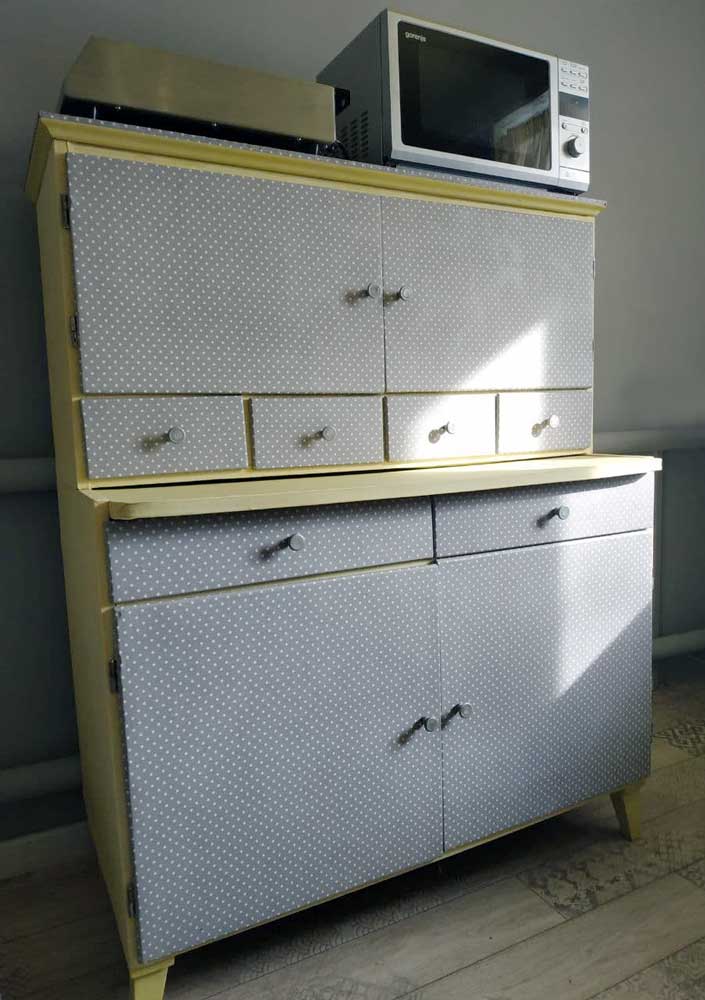
What I accomplished could have been done more accurately and with more attention to detail, but considering the three days spent, it turned out well—very budget-friendly, fast, and supporting the overall mood of the interior.
Thank you for your attention!